We will beat ANY like for like quotation. Contact us for more information.
Resin-bound surfacing · Surrey
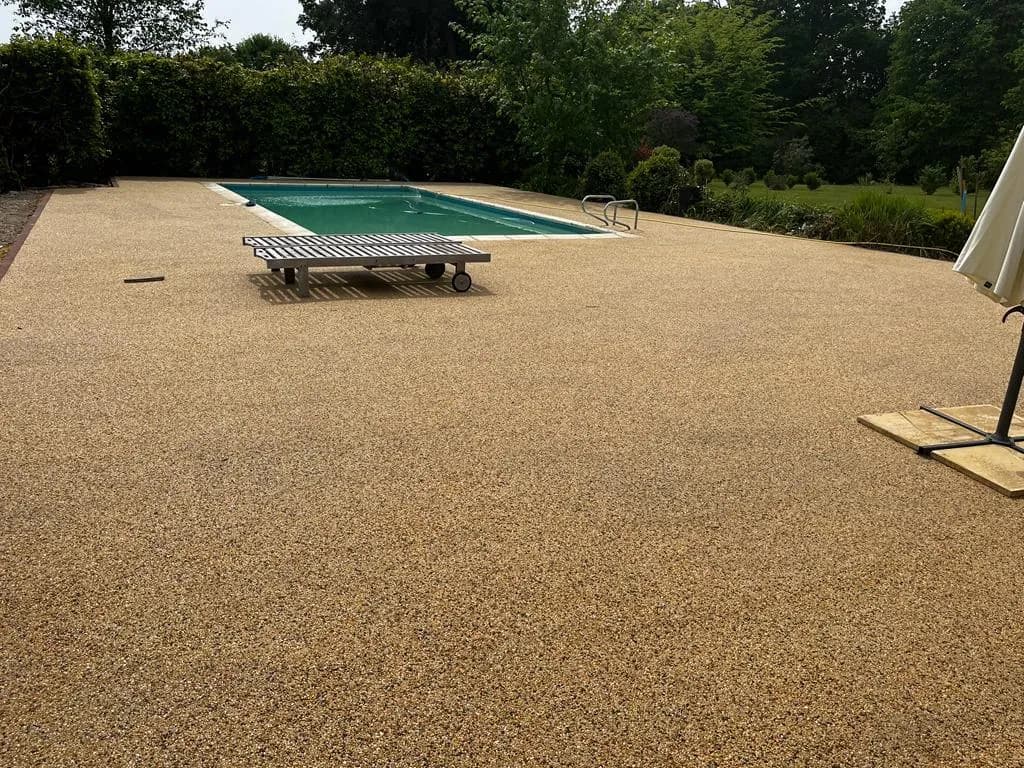
The concrete surround to a garden swimming pool had aged and stained. The owners wanted a smooth, seamless resin-bound finish in a warm tone that drains freely and is comfortable underfoot around the water.
The project, start to finish
Tap any photo to view it full size.
The brief
The concrete surround to a garden swimming pool had aged and stained. The owners wanted a smooth, seamless resin-bound finish in a warm tone that drains freely and is comfortable underfoot around the water.
The work
We prepared the existing surround and set the edges, then mixed the resin-bound gravel in the warm crème brûlée colourway on site and trowelled it out by hand to a smooth, seamless, permeable finish that ties the whole poolside together.
The outcome
A bright, seamless resin-bound pool surround that sheds water quickly and lifts the whole garden — a clear step up from the tired concrete it replaced.
This was a resin-bound surfacing project in Surrey. We cover Surrey, UK for residential and commercial surfacing.
How we work
A patio or pathway lives at ground level, takes the weather year-round, and is looked at from the house every day — which means the material choice and the laying method both matter more than they do on a driveway tucked around the front. The two finishes we lay most in Surrey are porcelain and natural sandstone, and while they can look similar in a showroom photograph, they behave very differently in a garden and need different installation methods to stay flat and bonded.
We visit to measure the area, check the existing ground level, and identify where water naturally wants to go. We bring material samples to view on site and agree the falls plan before quoting — so there are no surprises about how far the finished surface will sit above or below the house threshold.
We excavate to a depth suited to the slab thickness and the ground conditions — typically 150–200mm including the sand-and-cement bed — and compact the sub-base. Any soft or waterlogged areas are addressed at this stage. Edge restraints and any point drainage channels are set before bedding begins.
For porcelain, each slab is back-buttered with a slurry primer before bedding — the critical step that bonds the tile to the mortar and prevents hollow spots. Sandstone and other natural stone slabs are laid onto a solid sand-and-cement bed and tapped level. We cut around manholes, steps, and irregular shapes with a disc saw rather than snapping.
Once the bed has cured, joints are filled with a flexible jointing compound suited to the material — standard brush-in mortar for most natural stone, a dedicated grout or Geo-fix style compound for porcelain with its tighter joints. Natural sandstone and limestone are sealed on request to slow staining and algae. We clean the surface down and walk through the finished job with you.
Questions
Light foot traffic is usually fine after 24–48 hours once the mortar bed has taken its initial set. We recommend leaving garden furniture off it for a week and avoiding anything heavy for at least that long. In cold weather — below five degrees overnight — curing slows considerably and we may recommend a longer wait or schedule the work for warmer conditions.
Outdoor porcelain is manufactured with a textured or structured surface and carries an R-rating (slip resistance). We only specify R11 or higher rated slabs for patios and paths — the smooth-faced interior-style tiles that look similar in photos have no business going outside. If you are comparing quotes, ask for the slip-rating of the slab being priced.
Sealing is worth doing and noticeably slows staining, algae growth, and water absorption — particularly on a south-west facing patio that gets leaf debris or a shaded area that stays damp. It is not permanent protection; a penetrating impregnator typically lasts two to four years before it needs reapplying. We can apply it as part of the job or advise on the product if you would rather do it yourself later.
Sometimes, but natural stone in particular varies batch to batch and the existing slabs will have weathered. We will always be honest about how close a match is achievable before you commit. Where a perfect match is not possible, designing a clear break between old and new — a different row, a different width — often looks better than a near-match that visibly differs.
Steps and level changes are designed in at the survey stage so we know the rise and going before we start. We build steps from the same material as the main surface wherever possible so the scheme reads as one. The falls on each tread are set slightly forward to shed rain, and nosings are left square rather than bullnosed unless you specifically ask for the rounded edge.
More like this
Tell us roughly what you'd like done. We'll come out and quote in writing.